Animation Nation

This morning I put some more effort into the glock. Added a 3 bone skeleton + 2 quick animations. My goal here was to rush into unreal to get a good feel for things. On that front also I’ve realized I have been making a mistake for the better part of 5ish years. I’ve been exporting as .fbx because I assumed that was an industry standard, but I soon realized from looking at a few blender forum posts: https://devtalk.blender.org/t/fbx-binary-file-format-specification/20814

The reason .fbx is so damn buggy is not because a general “asset pipelines are hard” it’s because the damn thing is a reverse engineered shit show. I always assumed there was no way to get blender materials and shaders into unreal but if you dump everything into a .gltf then EVERYTHING GETS IMPORTED.

The magic gltf button…

Only downside is that your scale factors dont transfer over and 1.0 unit is always going to be 1 inch. But honestly that’s soo much easier than memorizing the settings for unreal (scale: 0.01, units cm if you were wondering).

Praise blender gods they’re all there!

Now with that I setup the ol’ unreal animation pipeline. This always feels like a chore to me, I should really package up a template for this character pawn and the animation blueprint into a package at some point and maybe distribute it on the store. Maybe I can save a younger dev on going through the same crap that took me a few years to understand. To re-iterate the process

1.) Import all of your animations (INCLUDING AN IDLE OR T_POSE ANIMATION), ideally you would make the model + rig in one file and throw animations in the other. Then upon import click your pre-made skeleton from file A and then only import animations from file B (makes life so much easier).

2.) Make a new animation blueprint, open it, go to the “AnimGraph”. Right click on the grid, type “state machine”, click state machine, drag a line from state machine to the “Output Pose” block.

3.) Double click the state machine to start editing.

4.) Right click, hit “add state” name the state “Idle”

5.) Right click, “add state” name the state, “Fire”

6.) Drag lines from “Idle” to “Fire” and from “fire” to “Idle”

7.) Double click your “Idle” state to open it.

8.) Right click and type the name of your idle animation and the one that says “play animationName” click it. In my case my idle animation was called “glock_idle”

9.) Drag a line from your idle animation to the output pose so it looks something like this:

10.) Now repeat steps 7-9 with your fire animation (use the top bar to back out back to the state machine)

11.) Now add a new variable called “isFiring” to your animation blueprint (make it a boolean) and make sure it’s a public variable (make sure the eye to the right of isFiring is open)

12.) Double Click the symbol above the arrow that points from “idle” to “Fire” (I’ll call this the “Transition Symbol”

13.) Get isfiring and drag it to the “can enter Transition”

14.) Back out to the state machine and click the transition symbol for the arrow that goes from “fire” to “idle”

15.) Make this blueprint (“fire_001” is the name of my animation).

16.) Now go back to your “firing” state, click your firing animation and scroll down to “isLooping” , hit the bind drop down and select “isFiring”. (If your making a fire firing gun you wont see any difference in this step, but for a pistol it will clean up the transitions in and out of the “firing”state”)

17.) Now click “Compile” in the upper left, then at the lower right check “isFiring” and your weapon preview in the upper left should start playing the firing animation. (Make sure you have “edit selected instance” checked when you mess with this. “Edit Defaults” sets what value “isFiring” is when the blueprint starts, you want that to be false.)

(Ignore the sound and the sparks, besides the fact they suck we’ll get to there in a bit).

17.) (Optional Step) By default the blending mode when transitioning states tries to blend from idle to fire instead of just hard stopping. The default settings should be good for most people, but if your seeing your gun half shoots, then keeps shooting try this out.
Go back to your state machine: Single click the top transition symbol, in the “details” tab set duration to 0.0. This should prevent any gross slides from your idle pose to your fire pose.

18.) (From here on out I’m assuming you’re using the first person template) Now setup a shoot button in enhanced input if there isn’t one already. (See https://dev.epicgames.com/documentation/en-us/unreal-engine/enhanced-input-in-unreal-engine)

19.) In your character blueprint class add your weapon as a skeletal mesh to the camera. After adding setup the skeltal mesh to use your imported mesh, and set the animation settings to use your blueprint.

20.) Add this to your event graph.

  • Where “IA_Shoot” is the name of the enhanced input event that I made and added to the enhanced input objected use for this character
  • “Gun” is the name of the skeletal mesh that I added to my camera in my character
  • ” Glock_animBP” is the name of my animation blueprint class.
  • The print string block is for safety, if you see “BAD CAST” pop up on your screen you’ve messed something up.

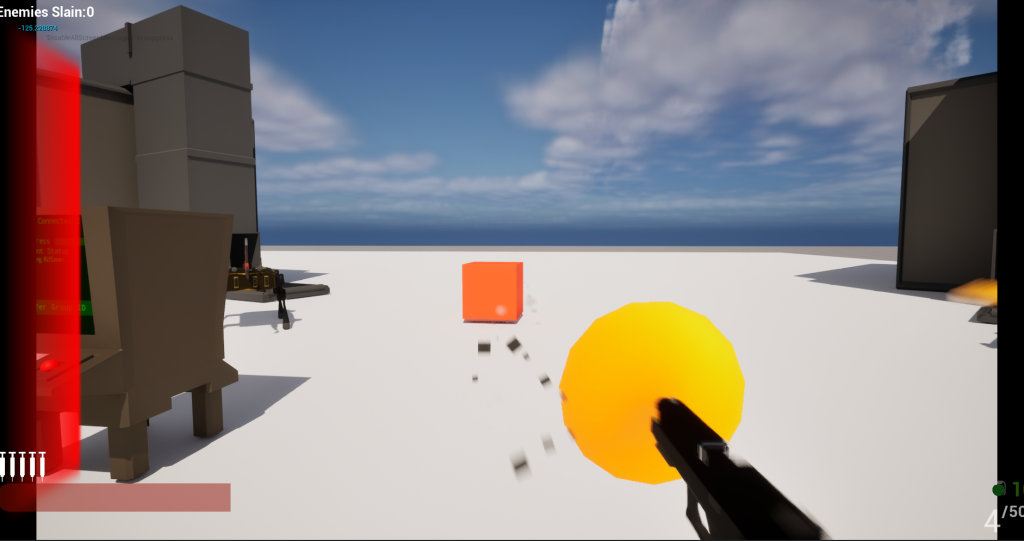
21.) Go back in game and now when you shoot you’re animation will play:

22.) Now to add sounds+particle effects. Navigate to your fire animation in the content browser and double click it.

23.) There will be a playback line scrolling from left to right on the bottom, find the Time that you want to play a sound, right click on the horizontal bar that starts with “1”, right click > Add notify > play sound

24.) Now click the new sound notify and in the details tab in the upper right corner choose your sound:

25.) Back in the timeline section, next to the #1 on the left click the track dropdown and select “insert notify track”

26.) Now you should see a #1 and #2, next to the #2 right click where you want to see a muzzle flash and select “add notify” > Play Niagra particle effect. Now you should be setup to tie a muzzle flash to your animation. (Learn here: https://dev.epicgames.com/community/learning/tutorials/8B1P/unreal-engine-intro-to-niagara)

Only caveat there is that you’ll probably want to add a socket to your bone to attach the niagra system (learn that here: https://docs.unrealengine.com/4.27/en-US/WorkingWithContent/Types/SkeletalMeshes/Sockets/ ,,technically out of date but the same flow applies to unreal 5).

I really thought it would take me 10 minutes to list out what todo but it took me the better part of an hour.

Anyways as you can see the glock animations seem to be fine (I’m probably just going to do goldeneye style reloads) the sound and the muzzle flash kinda suck so that’s probably the next thing to do.

Yet Another loop

This one is more heady. I originally had more bass and general fuzz but I decided to tone things down once I found a nice voice “ahhh” sound in abelton. Nothing to crazy but I can see it falling into one of those rainy day vibes videos.

Still need to change that photo…
Auto-pan + a half sample is my friend

Pistol Pt 2.

I decided to forgo the attempts in substance for now and just make a minimal (lazy) textures that can be used in a game quickly if needed.

Geometry is pretty much the same minus the slots on the side and the newly added mag and slide release. Still kinda skinny if you ask me but good enough for majority of uses in my opinion. I’ll probably animate it and get it into unreal over the next week just to tell myself it’s “done” for now.

Still probably the best thing I ever made in blender in my opinion.

(Start of) A Pistol

I started grey boxing a glock type pistol to put in unreal. It went much smoother than I guessed it would. This was my first time trying to go from zero to 100 with using primarily reference images instead of just throwing things into blender to see what happens.

Now there’s a bunch of things missing, mostly in the controls side but I think I got a base to keep going and properly zone out each region to eventually add animations.

The biggest problems are: 1.) The back grip looks kinda bad and flat. 2.) There are no grip plates on the sides which I’m not a fan of. 3.) There’s no rail up front for mounting flashlights are whatever. 4.) the bottom and top slide don’t fully touch so there’s a small gap:

What’s straight missing is: Slide release, mag release, any text indicating what the gun is, and finally I didn’t make the mag this time around.

I think there’s also some more beveling I can do around the edges of the top slide to get things cleaner and smoother looking. But to be honest starting this surprised me, I didn’t think I had it in me to get a recognizable glock modeled, let alone getting UV’s reasonable enough to pull into substance. Definitely I’ll try to keep on this to get a base weapon into unreal.

How the hell do I open these doors

Answer: A bunch of number keys and a non-de-script knob

Now I see how damn clean that scroll wheel guard is and I hate it…

Past week I spent time making a keypad for the doors in one of my previous posts. This guy took some doing: specifically because 1.) I didn’t know that grids in blender existed and 2.) the coloring on the keys made me anxious every-time I tried to make something.

Here’s the greybox:

I had a bunch of iterations here but the three main things were having a keypad, a indication LED and a screen. My hope is to hook this baby up to the doors i made previously to have a quick key code minigame thing in unreal.

By far the hardest part was making not the keypad keys but the plate that would go in between the keys and surround them. One of the biggest things I always try to prevent when using blender is having any issues with normals. Usually it’s hard to come by them if you model in a proper manner (which can be summarized to: always make quad faces.). However, in this case I thought I could use a boolean modifier to make the plate which turned out pretty bad:

With the keys
Without the keys

You can see here the whole face is messed up however in blender things were looking fine. I don’t have an image for what it looked like but basically it was the keyholes with a subtraction modifier then beveled. Here’s quick demo of what I did:

Step 1. make a bunch of cubes, add an x and z array modifier to each then apply.
Step 2: add a difference modifier to the plate mesh
Step 3, select all of the forward face, the ctrl+b and bevel that

Now there’s some disconnect because if you pull this into substance (I didn’t do this with the demo) all hell breaks loose and your normals are thrown into a rock tumbler to get that keypad image above.

However I got past it by using the now holy grid:

Praise be to the grid baby

Which is a bit more painful for inital creation because you have to line it up with your keys but once you do it’s just a quick insert faces, then delete command.

Pretty much that, assume there are perfect squares infront of each face, then I deleted each key face ans solidified + beveled

But anyways It seems to look fine in game:

The knob doesn’t have the notches I want, but I can easily make the screen look like it’s on with emissives:

Pretty cool, now I gotta hook it up and import the new doors to start fleshing out this building.

I don’t really listen to DnB

But it seemed interesting so I gave a couple hours trying to throw together a faster (180) bpm song.
I went crazy with the scenes in this case which is probably unnecessary, I had 13 in all but most are repeats.

Trying to find a good dnb kit got me looking through some of the newer drum kits that come with abelton which can be pretty sweet. There’s so many now and all are much better quality, I’ve only been messing with the 808 the last few years.

The Majority of the work on this was getting some of the operator settings just right. The first sound that comes in (which I was calling “plane Landing”) Is basically a 1/12 sync lfo with really long attack envelope on all of the oscillators.

The reason the lfo appears to slow down is because I also tied it into the pitch envelope along with the oscillators.

If I wasn’t lazy at the bottom I would have automation to set the pitch envelope slider to zero, but in this case I just copy+pasted the operator and removed the pitch envelope and any attack to make it seem like the “Plane Landing” turned into a stable note (which I called “plane driving”):

Finally most dnb has some kind of silly audio clip in there. In this case I still had the track from pacific rim lying around and I didn’t see a reason to have more of that in everything.

The main thing I don’t like about this is that I didn’t do much eq on any of the tracks. I had some compressors just to save speakers from the snares, wobble and the static-y stabs at the end but really everything seemed to be more balanced than I’m used to. The drums are actually two separate kits, I didn’t have to add any extra reverb other than what was in the base Abelton template. All around pretty great.

MoreDoor (modor?)

Took another crack at making a door today. This time around I focused on two things.

1.) Make the window smaller

2.) Use more normal mapping over geometry

Getting this setup in blender was much simpler this time around:

By avoiding details everything went by quicker in this stage. Only thing that took time was getting bevels right but really that’s like a 2 minute process. Once it was in substance I went crazy with some of the built-in normal modifiers. However it turned out much better than I expected.

I’m really digging the way the paint turned out, giving it that worn future painted feel. That being said the screws should probably have more wear on them, which I attempted to do but didn’t figure out how to add a mask paint layer until mid-writing this post.

Only issue right now is that the door feels barren and the handle seems out of place. I’m thinking I’ll try pulling it into unreal and adding decals dynamically (probably something like children’s drawings, posters, etc.). However that handle is a straight up eyesore. Also you can see the borders of the brush I used around the window:

I can go back and touch it up if I think it looks alright in unreal.

Another loop

This one isn’t that complicated. I basically make a quick drum loop I liked, found a very reverb-y synth and pushed the drums and lead synth into the reverb hard to lazily “auto-mix” stuff.

Basically if everything is in reverb you can get away with not equalizing stuff.

..and yes it’s a 8 bar loop that I just repeated like 20ish times, so after the first 20 seconds you’ve heard all there is.

Doors

A month or two ago I ran a cyberpunk RED campaign that I wrote myself. Over the past month or so I wanted to see if I could get my idea of the map into unreal engine 5.

Sidenote: I realized it would have made more sense to learn cyberpunk 2077 mapping for this project. However since cyberpunk 2077 part 2 will be using unreal 5 (https://www.pcgamer.com/cyberpunk-2077-director-says-studios-switch-from-redengine-to-unreal-engine-5-isnt-starting-from-scratch/) by the time I get something that looks good maybe it will be ready to pull into a sequel?

The original maps were made by cybermaps: https://www.patreon.com/cybermaps/posts (Subscribe to them, all the maps are great)

From the game I had 3 critical areas: The sewer, the night club and the apartment building. The goal for players was to head into the apartment building to find an npc that stole from the fixer that setup the job.

I also used twine to setup the story and prep for branching paths for the players. When I work on chapter 2 I’ll do a post on my process there (Also getting the data here pulled into unreal would be cool).

Greyboxing in unreal is pretty simple but like everything else more effort in == more quality out (when operating below the 80% mark like everything I do).

Here’s the working version:

Left: Lit map, Right: unlit map

Not great, but hey it’s a start. I put in lighting before adding any light source models just to make sure I don’t make any huge errors in geometry. Then I took a mixmo model and had them as npc placeholders across the map. That weird road texture is actually made procedural in blender (which I think is more of a admission of guilt rather than a flex).

I could have made a image in photoshop/gimp or even substance and it would have been simpler….

The first thing I wanted to make look kinda nice are the doors. I had a few mock ups before the doors in there now but I’m honestly not too much of a fan. The front doors to the apartment just straight crap rn, the texturing was a rush job and the doors themselves are kinda silly.

The double doors will be the player’s entry to the map so I think I’ll need special attention with those. However the interior doors seemed more manageable. I’ve gone through three iterations of interior doors:

Iteration 1:

I swore I had a first iteration here but I definitely saved over the first iteration with the 2nd iteration. If blender had a better style of source control (I could use git lfs but comeon) this could fix this issue. Future hopes is that blender gets a good internal usage of git/svn whatever so when I hit “save” it keeps a revision list like fusion 360.

Iteration 2:

This door was very rushed, you can see the scale is all off in the xy, the door is just a magic square the moves left to right. No indication of how the door works. Functionally this was nice for getting door sizes right but the greybox of the door has no shadowing so it’s actually really hard to see the window edge in bright light. The textures here I just spun up in unreal quickly and aren’t worth showing.

Iteration 3:

With iteration 3 I went hard into the “make sure someone could guess how this worked” which backfired imo.

Left: Back, Right:Front

You can see this huge bulge in the back where I thought the majority of mechanics would be held. On the front there’s a smaller budge which I think has the whole engineering method of “Oh shit we need more room” built into it. I took this door and threw it into substance to add some details

Left: Back, Right: Front

Honestly not the worst thing. It looks pretty cool with this lighting, so I dumped it into unreal to take a look.

From left to right: Back in game lighting, front in game lighting, back in asset view lighting, right in asset view lighting

Wow that took a turn for the worst. I’m not 100% sure how this happened, but at the moment everything looks like a cartoon, rather than the nice shiny metal from substance.

My thought is that the material type I’m using is probably not the correct type. I’m using a simple opaque texture but I gotta feeling because I was messing with the glass pbr shading in substance there’s an unreal equivalent.

But regardless of the door shading/texturing the real problem starts to become more evident when you get in game:

That’s a stright up jarring door to come up to. It looks like the hull of a spaceship with a huge window, both of which make no sense combined together. You figure you would either have a thin door with a pretty window or just a solid hunk of metal. Plus the goal of this building is to make it look like a rundown-ed future apartment which is controlled by a drug dealing gang. Why would they have freaking bulkheads for each apartment?

So back to the door drawing board I guess…

New Song

I do not remember how I made this. It was with the shruthi1 that my brother rebuilt and a premade kit in abelton live. The date was april-may ish (I think) on the original listing. The synth sounds a little too much like a foghorn but I think the breakdown of the couple of snare+base hits are nice.

I know for a fact that I didn’t make the drums because LOOK AT THAT:

You’d have to be psycotic to manually set the velocities to that. Must’ve been someone with drum pads.

Anyways here’s the loop:

todo-remove my stupid pic from 5 years ago from soundcloud.