Gadot Bro a.k.a. Wonder Wonder Woman game engine a.k.a. Side project to a side project

I started messing with Gadot (https://godotengine.org/) to fulfill the free-form open source activist in me (also I have a friend making stuff in Gadot).

So I started messing with the 3d side but the goal is for a more metroidvania type game. So I moved into understanding the 2d asset pipelines a bit better. The way I want to handle this is to:

  • Make a spritesheet(s) with four different animations: Idle, walk, jump, land
  • Make a character using the sprite-sheet with simple controls
  • Stretch goal- Add landing and walking smoke effects

Making spritesheets has gotten so easily since I was making simple games in XNA (15ish years ago damn…) now you can do everything in browser. I’m using https://www.piskelapp.com which is very fast and reliable for dumping a .png for a sprite sheet.

I’m going with a stick figure. I’m cool with jank walking but as long as you get four frames I you’re good (https://en.wikipedia.org/wiki/Walk_cycle). My finalized sprite sheet:

First three two frames are idle (just a simple bob). The next four are the jump/land cycle, the rest are walking (which I can invert for each direction in gadot).

Gadot has a REALLY good sprite sheet importer:

It lets you chop, then select which frames to import. In that way you can keep 100% of the sprites in one huge sprite-sheet and not worry about flipping between files at runtime (which in reality isn’t a big issue but I imagine you’re going to hit performance on low ram platforms with 1000+ pngs loaded in memory).

The animation editor once you get frames in place is SUPER easy and lets you quickly edit and test spritesheets as needed:

All of these get stored inside of your “AnimatedSprite2d” instance that can be selected via sprite frames property:

Now the scripting in gadot mirrors unity (and unreal kinda) where everything has a setup and loop function that you edit to handle internal logic to your “Nodes” (which are called actor and gameobject in unreal and unity respectively). Gadot doesn’t have a nice state machine editor like unity or unreal so you need to program it up yourself. The design of the simple character is actually expecting you to do this so there’s there’s state and utility funcitons in both the character and sprite classes that let you do this easily:

extends CharacterBody2D

const SPEED = 300.0
const JUMP_VELOCITY = -400.0
@onready var _animated_sprite = $AnimatedSprite2D
#AnimationStateMachine
var startJump = false
var isFalling = false
var endJump = false
var isWalking = false

func _physics_process(delta: float) -> void:
	# Add the gravity.
	if not is_on_floor():
		velocity += get_gravity() * delta
		startJump = false
		isFalling = true
	elif isFalling and is_on_floor():
		endJump = true
		isFalling = false
	elif endJump and is_on_floor():
		endJump = false
	else:
		endJump = false
		isFalling = false
		
	# Handle jump.
	if Input.is_action_just_pressed("ui_accept") and is_on_floor():
		velocity.y = JUMP_VELOCITY
		startJump = true

	# Get the input direction and handle the movement/deceleration.
	# As good practice, you should replace UI actions with custom gameplay actions.
	var direction := Input.get_axis("ui_left", "ui_right")
	if direction:
		velocity.x = direction * SPEED
		if(absf(velocity.x) > 0):
			isWalking = true
		else:
			isWalking = false
	else:
		velocity.x = move_toward(velocity.x, 0, SPEED)
		if(absf(velocity.x) > 0):
			isWalking = true
		else:
			isWalking = false
	move_and_slide()
	handleAnimationStateMachine()

func handleAnimationStateMachine():
	if startJump:
		_animated_sprite.play("Jump_start")
	elif isFalling and _animated_sprite.animation_finished:
		_animated_sprite.play("Jump_loop")
		startJump = false
	elif endJump and  _animated_sprite.animation_finished:
		_animated_sprite.play("Jump_end")
	elif isWalking and _animated_sprite.animation_finished:
		_animated_sprite.play("Walk")
	else:
		_animated_sprite.play("default")
		endJump = false
		isWalking = false

If you have no idea what this is doing essentially its:

Final result:

So I’m pretty confident here that if someone threw me a bunch of sprites/2d art I could go ahead and make a game. Gadot has the same issues as unity where the structure is much less defined than Unreal. Therefore its crazy easy to prototype but scaling up will take more developer discipline to prevent Node spanning bugs and state issues. In my head the rough hierarchical structure of any 2d sidescroller would be:

The way to read this is that the controller points to the controlled. So the game master controls everything the scene master controls characters and cut-scenes etc. With this structure way you don’t get confused with race conditions etc. If you’re a lower level object that wants to initiate a high level event you’ll be forced to request up the chain (i.e. an npc that the player presses use on will send a request to the scene controller to start a cut-scene, which will then send a request to the game controller which then can trigger the cut-scene player). It seems confusing and over-engineered but if you consider the alternative you would need everyone to align to some other kind of mental model, which in my opinion can be crazy painful to handle and leads to a BUNCH of crunch.

Leaning Updates

(Writing as I’m doing this fyi) I wanted to re-write the leaning in the game. Right now the movement is all very snap, which has some skewing to it but i wanted a more gradual lean in.

Event graph level

(Normally I would use https://blueprintue.com, but wordpress is weird about iframes)

Now you can see here the process is, press button, move to desired input. My first thought was to throw in the delta seconds of the last frame, add a rotator and vector interpolation block and be done with it, however, Unreal’s input system is actually made for this. If you look at the top blueprint I have a few branch statements that was thresholding based upon the input value. Instead I’ll use that input value to skew between the lean position and the rest position.

My lean action by default is a 1-d float which is cumulative, which should mean that as I press the lean keys (Q+E) the value of the lean action (the Axis value line from the first plot) should increase as the buttons are held down.

Therefore, if I just use that value to skew between the lean position and rest position I should be good….

I was not good

What I described above is TOTALLY not how this works. Advanced input seems to not hold any kind of state from the previous frame unless you’re using defined curves. For example there is a “scale by delta time” modifier that works but it takes whatever the current input is and multiplies it by the frame time. This can be useful but my goal here was to avoid adding another accumulator within the player blueprint class. You can add an exponential curve but that’s just a modifier to the input values. I don’t think there will be a good way here other than adding a “currentInputValue” modifier and having it decay at a fixed rate…

This is one of those situations where I shot myself in the foot for using blueprints, however I think there’s enough syntax and other bugs that I saved myself from that I don’t care that much. For example In matlab (which I use a bunch at work) this problem can be solved via:

startPos = [-10 -20 -40];
endPos = [-10 20 40];
restPos = [-10 0 60];
inputAxis = linspace(-1.0,1.0,3);
[iAx iAy iAz] = meshgrid(inputAxis,inputAxis,inputAxis);
[xOut yOut zOut] = interp3([startPos;restPos;endPos],CURRENT_INPUT_VALUE,iAx,iAy,iAz);

I think unreal can do this with curves but my head moves towards code when we get to 2+ dimensions. But honestly this is me overthinking on coffee at this point, I’ll just throw it in with another accumulator and some alpha smoothing (https://en.wikipedia.org/wiki/Exponential_smoothing, which I believe is implemented in https://dev.epicgames.com/documentation/en-us/unreal-engine/BlueprintAPI/Math/Smoothing/WeightedMovingAverageFloat)

Attempt #1

First thing I is that I embraced curves:

Which was so simple I’m confused why I didn’t start with these. The only hitch I had is that it was annoying to find the “getVectorValueFromCurve” block. If you just blindly add a curve class or runtime curve class this isn’t exposed. Now the results:

This worked but now I’m hitting issues with state management. The rough way the Unreal input system works is:

if(currentState == buttonPressed && previousState == buttonReleased)
{
   Trigger(inputValue);
}
elseif(currentState == ButtonReleased && previousState == ButtonPressed)
{
   Ongoing(inputValue);
}
elseif(currentState == ButtonReleased && previousState == ButtonPressed)
{
    Complete(inputValue);
}else
{
    //DoNothing
}

Which essentially means that putting the logic attached to button presses is a fools errand. I need to move it out to the tick function, or I need to figure out how to modify the states above to keep firing the “completed” state.

Attempt #2

I tried messing with advanced input and hit the same state issue. I was hoping I could set the trigger to also be released but it never hits more than once.

No dice…gotta push the input value smoothing and the lean function to the delta. This will require another variable to handle the previous input value of the lean buttons. This might mess up the way I visualize the math but lets see what happens.

Attempt #3

This seems to be the best lean method. Essentially I needed to add one more var to handle the current value of the input and keep the same one that defined the previous variable. Below is the blueprints.

Tick event is the input to the left

Pretty simple at the end of the day. Hard part about this stuff is never what you’re doing its always that transition from what you’re doing into the mental model that the unreal devs used.

Finally my management failure…

Which doesn’t really matter too much because I’m working solo, without a server to push content to. However its just bad practice to not protect yourself from silly confusing mistakes (which will increase as you get to the end of development).

Next goals

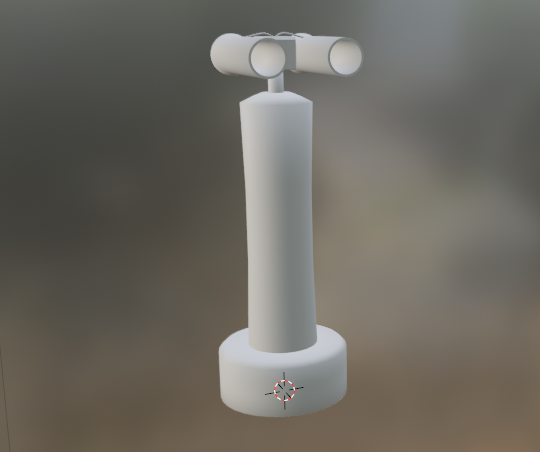
1.) Add a flashbang and grenade robot (look back in my notes I have a flashbang and m67 already modeled).

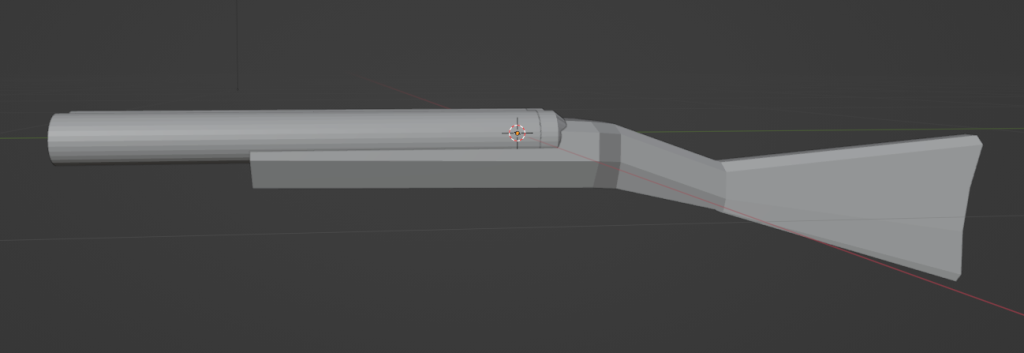
2.) Add a new weapon

3.) Add a humanoid character that rides the robots?

Chaos Physics 1…me 0

Spent a bunch (like 1-2ish hours) of time trying to get the chaos physics working with the tree and…

It kinda works but the issue comes into the in game interaction. The damage levels seem to be weirdly arbitrary and aren’t assigned to a root bone but the pieces themselves Also the definition of “damage” seems to be just a number that gets exceeded in a fixed amount of time. I could probably figure this out with another day or so of digging but I’m starting to get fixated on this rather than just straight up making the game. However, I’m going to go through my experience just to give an intro/document for myself in the future.

Making a destructible object

This part actually wasn’t that hard, essentially you just drag/drop a mesh in. Flip to the “fracture” mode and click new. Then you start using the slicing tools on the left hand side to cut apart the mesh, then you select sub-part of the mesh and cut again.

This creates a tree of destructible on the left hand side where each “level” is a root piece that has child pieces.

So the idea seems to be you break the root the rest will break off. However, that’s the part I’ve been stuck on, there’s damage settings that seem to not work the way I would expect. Either way I’m moving the goal to making more weapons and enemies.

Tree part 3

Recording myself modeling another tree. Then I realized I probably shouldn’t be posting videos with copyrighted music, so I made a song to go along with the tree recording (I used some of the pre-canned abelton clips for bass and vocals which feels like cheating but I wanted something kinda alright and fast, the drums I did myself.)

There’s one branch that looks weird to me but otherwise I think it came out alright.

This also was my first time using KdenLive (https://kdenlive.org/en/) which is surprisingly good for an open source video editor. Last time I was editing video heavily was probably in high school with a trial copy of sony vegas and windows movie maker.

Highly recommend if you want basic timelines + audio editing, if you’re going crazy with effects might be better to stick to adobe’s software.

Now I can go probably make small variations to the same tree 3-4 more times to get a good low-poly forest going.

More Tree For Thee

I made a better tree, not perfect (it still has the weird branch in the upper left) but its more passable than the other tree I made.

I also found in unreal the “Foliage” system ( see https://dev.epicgames.com/documentation/en-us/unreal-engine/procedural-foliage-tool-in-unreal-engine ) which is the opposite of the “Landscape” system used for grass. Essentially it lets you spawn hundreds of a single actor and handles it externally from the normal actors.

The trees now have collisions!

The first thing I wanted to try getting working was having bits break off of the tree.

This can be done using unreal’s chaos destruction but I’m still messing around with the parameters. I tried the current tree and it just kinda falls apart really quick:

My hope is that when your running through the woods getting shot at a bunch of splinters will be flying through the air as bullets hit trees.

When applied to the whole forest you get a cool view of all of the tree’s falling apart slowly.

Maybe that would be cool for a menu or something, but really I need to make the chunks smaller and fix the split apart trigger so it doesnt just magically explode.

THE WOODS!

Jumped back into unreal but I’m heavily procrastinating the game parts so I started messing with some of the environment tools in unreal. Specifically I’ve been poking at the grass setup tools (https://dev.epicgames.com/documentation/en-us/unreal-engine/grass-quick-start-in-unreal-engine). Not too complicated essentially, your environment drives a few inputs and outputs in your landscape material.

So I whipped up a quick ground texture in gimp:

Where each layer is a bit more grass ontop of the dirt:

Then I whipped up two quick grass and tree models in blender.

Then once you import both into unreal you can tie everything together using a “LandscapeGrassType” which is just a data holder for what you consider grass:

Then throw it into your material

The final result was surprisingly good. Obviously I could add more grass, touch up the ground texture, make a tree that doesn’t look like a plastic pylon. But I’m dumbfounded how far this stuff has come along from unreal 4.

I have a strong feeling you’re straight up not supposed to use this system to add trees (You can see in the video above that the bullets don’t collide with the trees). But I’m still happy at least that the workflow is quite simple.

Drawing onto the landscape is very easy also, If I wanted to make a path I can just draw the rock layer in a quick line like in the video above.

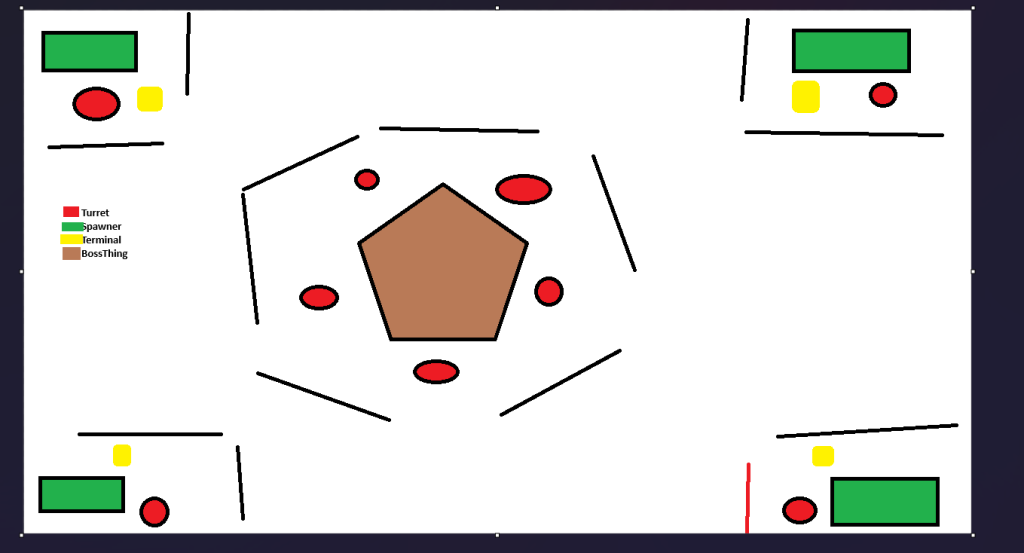
Now to the actual game stuff I’m thinking my next change into game-play will be moving things closer to kind of a pseudo helldivers mission where:
1.) Players spawn on a big map
2.) Enemies spawn a wave to attack the central spawn and players fight to survive/save the base
3.) Once the enemy wave is over players will leave the base to try to destroy spawners
4.) The next wave starts, the players run back to base and restock
5.) Rinse and repeat for all spawners
5.) Once the players destroy all the spawners a boss wave starts
6.)Players defeat the boss and the game ends.

Seems like a reasonable goal, it also sounds like a multiplayer game but honestly I dont wanna go down that rabbit hole yet. I have half of a multiplayer game made from awhile ago which seems like a good idea but it requires you to modify the engine build to pull in steamworks. My goal here is still to avoid using c/c++ so I can focus on just assets until I REALLY need to optimize. In addition making 3rd person models will probably require me to re-make a bunch of the blueprints which sounds horrible at this stage.

Table Part 2

Remade the table this morning:

The “Tris” number is something I forget to mention yesterday which is the thing that directly correlates to how hard a renderer (such as Unreal Engine) has to work to render something. Note the number is around 500 (which honestly might still be too high). The table yesterday:

Hopefully that reinforces the points from yesterday. In addition the UV maps are much easier to see, simple to understand and are broken apart by each component of the table: tabletop, legs, cross bar, leg flange and crossbar flange.

In addition proper use of mirror modifiers lets you do a single object:

Here’s the mirror modifier for the legs:

All in all its a table, it does what it’s supposed to and holds things off the floor. If I wanted to get interesting I can export each portion to unreal individually, re-attach things in game then when the player breaks the table it breaks semi-intelligently. However, I just wanted a table not a crazy physics object (yet).

Also here’s the table colored:

I the crappy wood coloring is from a quick noise texture in blender:

I have better wood/metal materials in the game so once exported that should clean itself up (hopefully).

How to not to Model a Table

Look at this table! Seems good right? …Right?……RIGHT?

I can promise you this is not good, you see when you make 3d models you can’t just “Make” the models. You need to plan and thing it through, the big things are:
1.) Keep the model as many simple shapes as possible
2.) Avoid complex faces that are not quads (i.e. 4 sided 4 vertex where it’s possible to rotate the face to be a flat rectangle
3.) Don’t repeat work (aka if you’re making a table make the leg once and copy+paste it…)

Now let me show you how I violated ALL of these checks

Above is the model view but I’m showing you the faces and vertexes of the model. You can almost immediately see the violations here. Everything is one piece, the legs are obviously done individually, there’s a weird slide in the middle of the table which serves no aesthetic value and if you zoom in on the top of the legs…

A TRIANGLE! However if you take the same pic in wire-frame you can see something much worse.

The bit circled in yellow is a hidden and folded face!!!! A big no-no especially for game dev where you’re trying to minimize the number of faces rendered on screen at once. Now you may ask yourself “Will. It’s still a table why do we care” the problem comes in when you make UV Maps.

from https://lkinulas.github.io/development/unity/2016/05/06/uv-mapping.html

To the uninitiated a UV map is a 2d projection of the external facing surfaces of an object, for a cube if you unwrap it you’ll get a chunky plus sign shape(more about this here: https://lkinulas.github.io/development/unity/2016/05/06/uv-mapping.html , which I skimmed but it seems better than anything I could write). Usually the way that adding textures onto a 3d model works is that you attempt to make the UV map in blender, then you dump into substance painter or equivalent program where you can paint onto the model in 3d, then you can dump the files out as text images. For example here’s the UV map of a keypad I made last year

Which here each of the keys have a single UV map, so therefore they have a single image to represent the color (known as albedo majority of the time, atleast with blender and unreal which both use “Physically based rendering” see https://en.wikipedia.org/wiki/Physically_based_rendering)

The 3d model holds the decoder-ring (which is the UV map) to convert the image file to properly positioned colors on the 3d model. Now you make now ask “hey everything you made for this game is literally a flat color and there’s no detail to mis-align” which is true. However with modern game engines they literally take the UV map and use that information to calculate how it interacts with light. An improperly made UV map can cause 3d models to flicker in bright lights, make them dark when they should be light and vice-versa. In the worst cases it can cause them to disappear entirely! In addition when you start doing things like bullet holes or blood stains on world models, an improper UV map will make the decal that is put onto the model become very mis-aligned from the intended position (think a bullet is shot at a table, the bullet hole should be where the bullet hit).

So now back to the table. The main issue here is that blender is actually pretty awesome at automating the generation of UV maps…Assuming your model is a simple geometry object (i.e. sphere, cube, cone, torus, plane) and doesn’t have the triangles. So if we try to automate the export of the table:

To give context of what you’re looking at, the left hand side shows each face on the table face, each grey square directly corresponds to each face on the 3d model on the right. If I select and individual face:

It shows exactly where the face will appear on the output image. So if you go back to the first image you can see that if I tried to just blindly apply either lighting effects or an image to the uv map we start hitting issues. For instance if I put a light directly on this corner

What will most likely happen is that everything in between those two faces will be lit in addition to the two faces in question. What’s in the middle you ask?

Not the areas you would expect to be lit. There’s also other factors here that I could get away with by getting creative with materials (which determine the direct lighting parameters like luminosity, albedo etc) but that would be much more work than just restarting, making a tabletop model, making a leg model and making a crossbar model then just copy+pasting the whole thing again.

With all of this you may also still be asking:
1.) Why are you making a table
2.) How does this fit into a game?
3.) Why are you blogging and modeling on Saturday night?

Answers:
1.) I haven’t made a model in a few weeks and I wanted to get my feet wet again
2.) Idk, places have tables. Wooden tables. Nice tables. With cross bars.
3.) It’s cold. I feel like crap and shut up

Also I’m straight up dreading adding more animations to the robot, I need to add a knife stab animation, a grenade throw animation and some kind of heavy shot animation. Unreal is very very bad at handling an updated model with updated animations. The process involves re-exporting everything as another .fbx file, deleting redundant animations, deleting the new re-imported base model and re-assigning each animation’s skeleton to the original skeleton and hoping you remembered the export settings from 6 months ago. If your forgot the aforementioned export settings you need to turn a knob keep doing the same process until things look kinda right. I’m debating on buying maya just to avoid this situation but I’d love to avoid learning new things until I get this silly game on steam.

Editors note (1 day later): I realized I wrote this whole thing without explaining why I did a bunch of dumb stuff: I was getting back to modeling and I just ran with the feelings for an hour rather than thinking it through. So I made a bunch of critical early mistakes which makes the model very hard to use.

“We have several items for purchase!”

I made a store stand that I’ll put a bipedal robot behind to be a shop owner. It’s currently not scaled or setup right to work. I think I’m going to make the lightbulb it’s own object that way I can swap colors on the fly. Right now I kept them in because I wanted to see what they would look like on the wire there. On the counter is a cardboard tip box and a metal lock-box.

Behind the Counter is a metal bucket (filled with what? Idk) and a generator that I’ll probably break out into it’s own object also.

In addition I wanna put a decal on the sign up top to say something like “robot killing weapons”.

Also I need to copy +paste the table a few times to make a full stand kind of thing. The proportions are definitely off so when I pull it into unreal it will be flippin’ huge. But before I do any scaling I’ll need to finalize everything on the table and fix up the wires so they’re not as blocky. Flat shading is fine but I think I can keep that vibe but put some wood texture on it for the next go around.

Grenade and stealing music to make more music

I have a few cassettes of older music that I wanna sample and put into something in Abelton. Why use cassettes? They’re cheap as hell, this one was $4 from my local record store.

I also made this guy:

Simple enough, getting it in game went smoothly. I don’t think I want to make this a first person model I’ll probably just attach it onto the front of one of the bots to make a kamikaze bot that rushes the player.

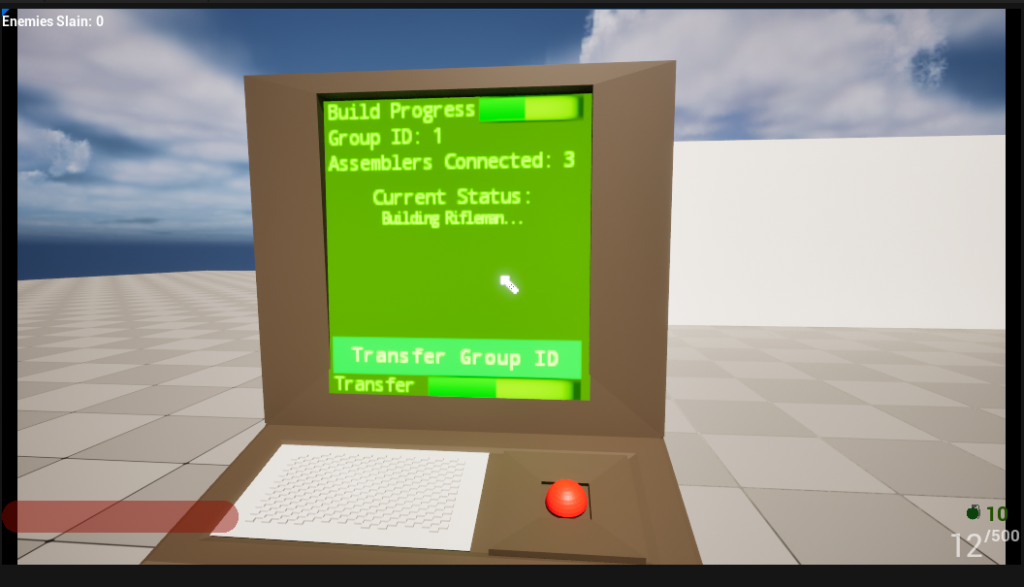
I also spun up a quick “use” system, which is just a ray-trace off the front of the player’s camera to whatever is in front of them. Then I made a generic “usableObject” interface which receives use commands that anything can implement.

This will be the first usable thing:

Idk what it will do but my hope is to make quick chat logs when you press use, or even a buy menu.