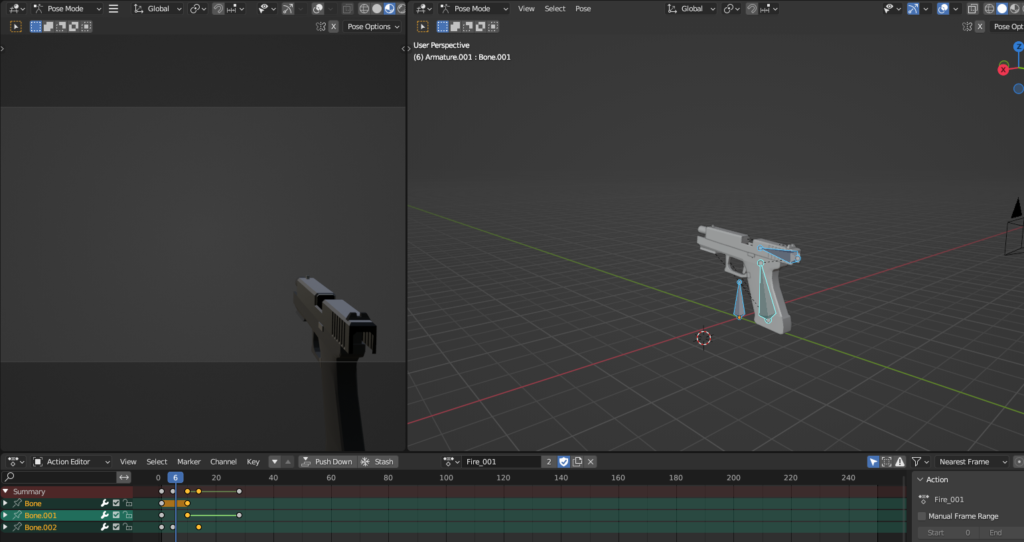
This morning I put some more effort into the glock. Added a 3 bone skeleton + 2 quick animations. My goal here was to rush into unreal to get a good feel for things. On that front also I’ve realized I have been making a mistake for the better part of 5ish years. I’ve been exporting as .fbx because I assumed that was an industry standard, but I soon realized from looking at a few blender forum posts: https://devtalk.blender.org/t/fbx-binary-file-format-specification/20814
The reason .fbx is so damn buggy is not because a general “asset pipelines are hard” it’s because the damn thing is a reverse engineered shit show. I always assumed there was no way to get blender materials and shaders into unreal but if you dump everything into a .gltf then EVERYTHING GETS IMPORTED.
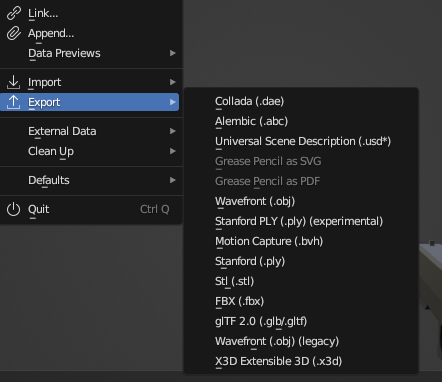
Only downside is that your scale factors dont transfer over and 1.0 unit is always going to be 1 inch. But honestly that’s soo much easier than memorizing the settings for unreal (scale: 0.01, units cm if you were wondering).
Now with that I setup the ol’ unreal animation pipeline. This always feels like a chore to me, I should really package up a template for this character pawn and the animation blueprint into a package at some point and maybe distribute it on the store. Maybe I can save a younger dev on going through the same crap that took me a few years to understand. To re-iterate the process
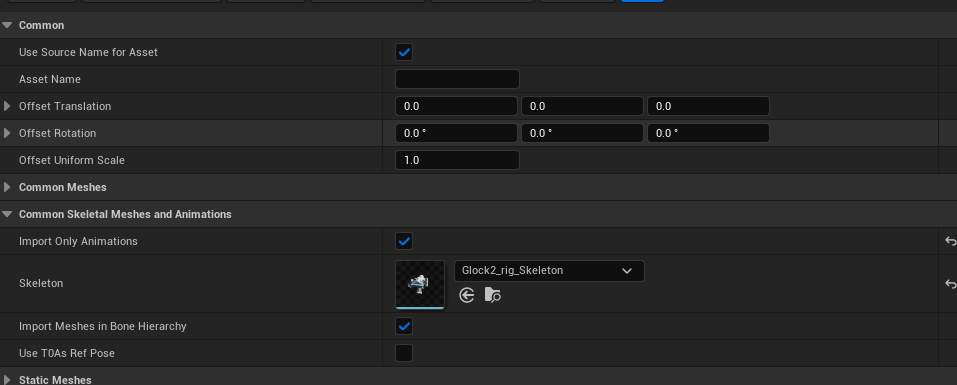
1.) Import all of your animations (INCLUDING AN IDLE OR T_POSE ANIMATION), ideally you would make the model + rig in one file and throw animations in the other. Then upon import click your pre-made skeleton from file A and then only import animations from file B (makes life so much easier).
2.) Make a new animation blueprint, open it, go to the “AnimGraph”. Right click on the grid, type “state machine”, click state machine, drag a line from state machine to the “Output Pose” block.
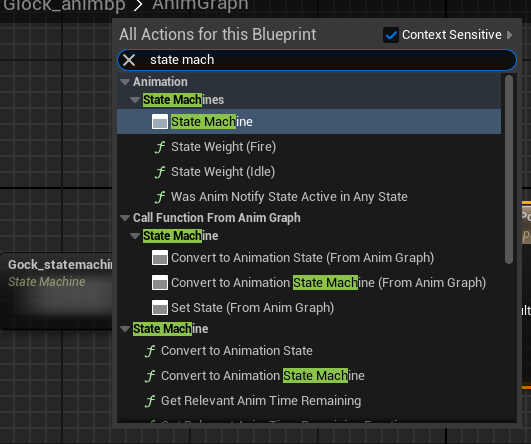
3.) Double click the state machine to start editing.
4.) Right click, hit “add state” name the state “Idle”
5.) Right click, “add state” name the state, “Fire”
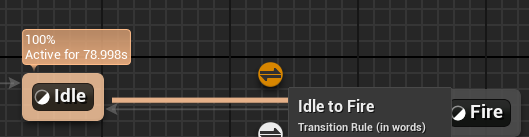
6.) Drag lines from “Idle” to “Fire” and from “fire” to “Idle”
7.) Double click your “Idle” state to open it.
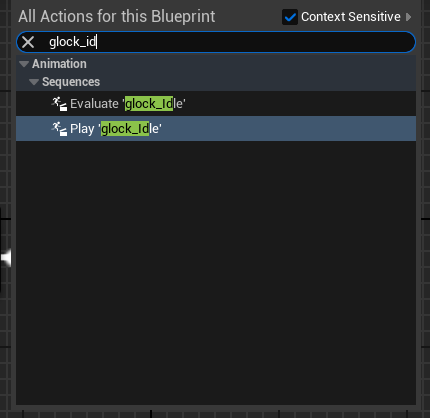
8.) Right click and type the name of your idle animation and the one that says “play animationName” click it. In my case my idle animation was called “glock_idle”
9.) Drag a line from your idle animation to the output pose so it looks something like this:

10.) Now repeat steps 7-9 with your fire animation (use the top bar to back out back to the state machine)
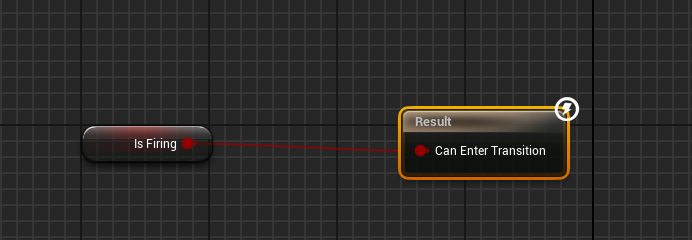
11.) Now add a new variable called “isFiring” to your animation blueprint (make it a boolean) and make sure it’s a public variable (make sure the eye to the right of isFiring is open)

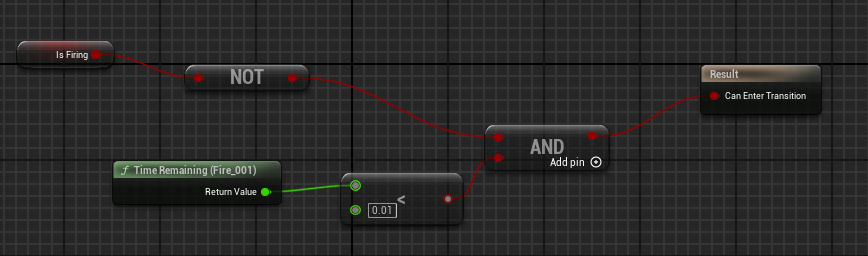
12.) Double Click the symbol above the arrow that points from “idle” to “Fire” (I’ll call this the “Transition Symbol”
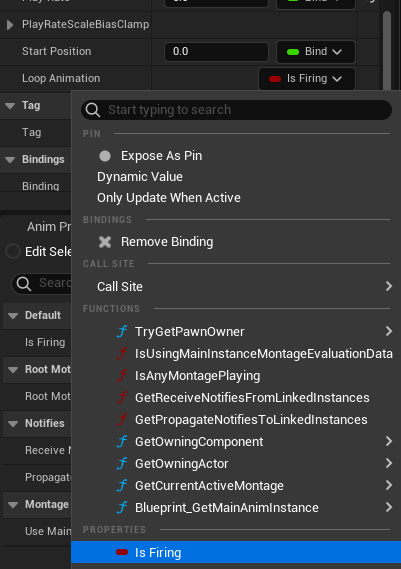
13.) Get isfiring and drag it to the “can enter Transition”
14.) Back out to the state machine and click the transition symbol for the arrow that goes from “fire” to “idle”
15.) Make this blueprint (“fire_001” is the name of my animation).
16.) Now go back to your “firing” state, click your firing animation and scroll down to “isLooping” , hit the bind drop down and select “isFiring”. (If your making a fire firing gun you wont see any difference in this step, but for a pistol it will clean up the transitions in and out of the “firing”state”)
17.) Now click “Compile” in the upper left, then at the lower right check “isFiring” and your weapon preview in the upper left should start playing the firing animation. (Make sure you have “edit selected instance” checked when you mess with this. “Edit Defaults” sets what value “isFiring” is when the blueprint starts, you want that to be false.)
17.) (Optional Step) By default the blending mode when transitioning states tries to blend from idle to fire instead of just hard stopping. The default settings should be good for most people, but if your seeing your gun half shoots, then keeps shooting try this out.
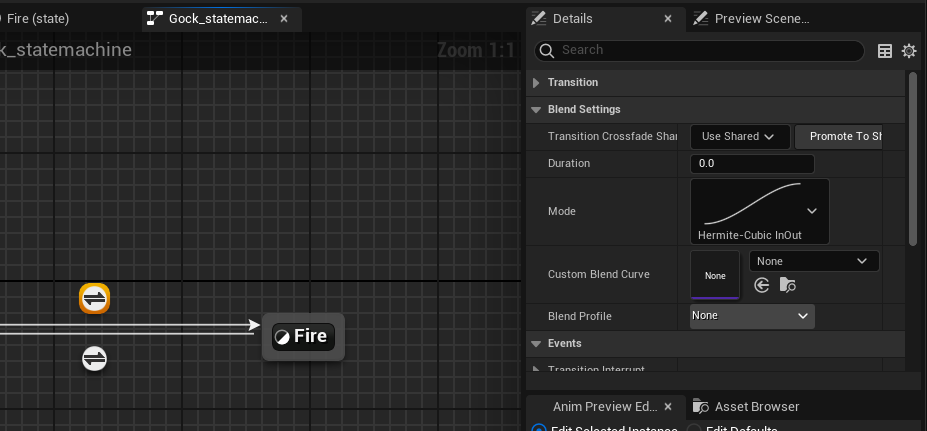
Go back to your state machine: Single click the top transition symbol, in the “details” tab set duration to 0.0. This should prevent any gross slides from your idle pose to your fire pose.
18.) (From here on out I’m assuming you’re using the first person template) Now setup a shoot button in enhanced input if there isn’t one already. (See https://dev.epicgames.com/documentation/en-us/unreal-engine/enhanced-input-in-unreal-engine)
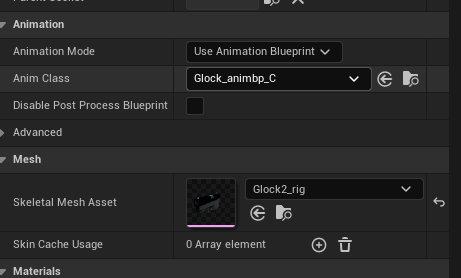
19.) In your character blueprint class add your weapon as a skeletal mesh to the camera. After adding setup the skeltal mesh to use your imported mesh, and set the animation settings to use your blueprint.
20.) Add this to your event graph.
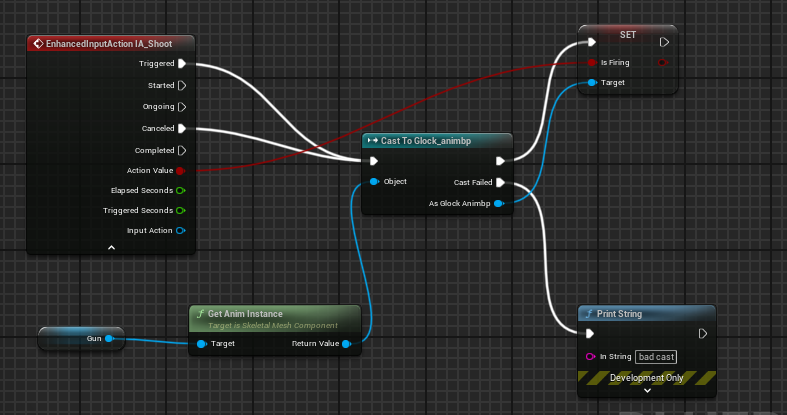
- Where “IA_Shoot” is the name of the enhanced input event that I made and added to the enhanced input objected use for this character
- “Gun” is the name of the skeletal mesh that I added to my camera in my character
- ” Glock_animBP” is the name of my animation blueprint class.
- The print string block is for safety, if you see “BAD CAST” pop up on your screen you’ve messed something up.
21.) Go back in game and now when you shoot you’re animation will play:
22.) Now to add sounds+particle effects. Navigate to your fire animation in the content browser and double click it.
23.) There will be a playback line scrolling from left to right on the bottom, find the Time that you want to play a sound, right click on the horizontal bar that starts with “1”, right click > Add notify > play sound

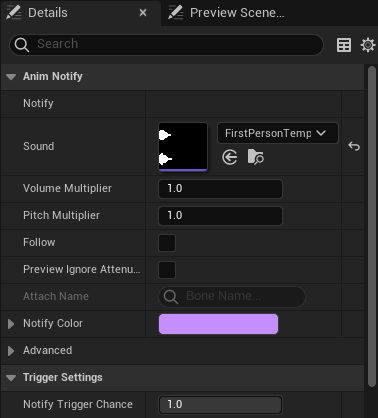
24.) Now click the new sound notify and in the details tab in the upper right corner choose your sound:
25.) Back in the timeline section, next to the #1 on the left click the track dropdown and select “insert notify track”
26.) Now you should see a #1 and #2, next to the #2 right click where you want to see a muzzle flash and select “add notify” > Play Niagra particle effect. Now you should be setup to tie a muzzle flash to your animation. (Learn here: https://dev.epicgames.com/community/learning/tutorials/8B1P/unreal-engine-intro-to-niagara)
Only caveat there is that you’ll probably want to add a socket to your bone to attach the niagra system (learn that here: https://docs.unrealengine.com/4.27/en-US/WorkingWithContent/Types/SkeletalMeshes/Sockets/ ,,technically out of date but the same flow applies to unreal 5).
I really thought it would take me 10 minutes to list out what todo but it took me the better part of an hour.
Anyways as you can see the glock animations seem to be fine (I’m probably just going to do goldeneye style reloads) the sound and the muzzle flash kinda suck so that’s probably the next thing to do.